Once the rear wall concrete set up good I added another tier of styrofoam cooler boxes, set in at odd angles, across the existing bed. The masonite and plywood forms again hold in the cement as I poured buckets over the styro coolers and filled the voids below. Whenever I had small bits of scrap cement I would pick them up and place them into the poured concrete...anything to take up additional space.
A third view of the masonite forming and the continuing buildup of the falls.
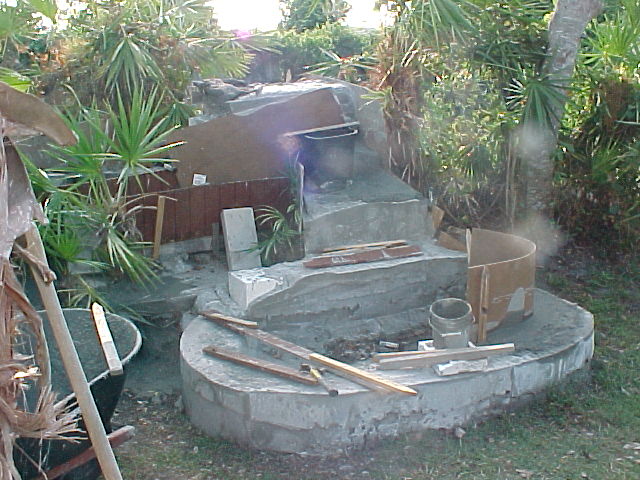
Now the back waterfall wall is approx. 2 feet in height and I was having a space to fill in between the rear wall and the ongoing pours for the cement pond. Using the smooth masonite sheets I blocked off the back of the pond, using bricks and anything of weight to secure the form. Then I stuffed broken bits of styrofoam, small bits of concrete, some old pieces of cement blocks and some rocks...all this went into the space and about 12 bags of concrete were poured over the tops. At this point I decided that I wanted to split the way the water falls thru the waterfall...I wanted some water to split off one side, flow down into a top 'shelf' constructed into the top of the back waterfall wall and the remaining water would cascade down the right side of the falls and into the cement pond in front.
Up and up goes the concrete waterfall building. you can see one of the styrofoam cooler blocks building up the waterfalls back wall.
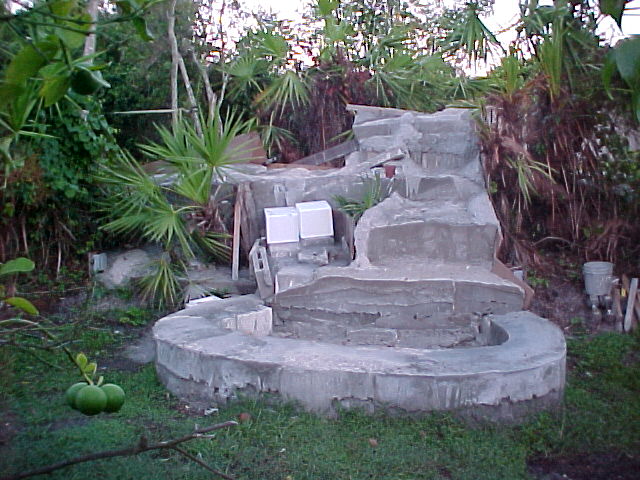
I added a third tier of styrofoam cooler 'blocks' along the rear waterfall wall but needed to add some substantial space on one end of the falls so that I could build a catch basin for the pump to discharge into. To gain this extra height and top square footage I was ingenious and used more junk from the garage. A long time ago I went to an auction and picked up 3 big food service heater boxes...these were really nice stainless steel warming boxes about 2 foot square by about 3 foot deep...big enough to hold hot food serving trays. These had a nice hinged front door and I figured that if I built them into the top of the waterfall I could leave the doors accessible so I could use the interior space later for storage. So I carefully stacked the stainless boxes on the right side of the waterfall top tier, framed it in with plywood and masonite. I found there were numerous gapps big enough for my wet cement mix to simply run out of the form,so to stop it up I broke up some of the styro coolers and stuffed the pieces down into the cement form, filling the holes and proceeded to fill out the form with another 6 bags of cement.